
Signing in for the first time
- Open “My Fridsee” and sign in with the same Fridsee account you use in the app.
- No account yet? Choose “Create account” and enter your name, email, password and household name.
- After signing in, select a household from the list. Inventory and shopping always belong to the selected household.
Guide: Local → Premium → cloud
Activate Premium → copy your data → enable cloud mode
One Premium subscription covers all current members of that household. Each member uses their own account and does not need another subscription.
Before you start: save a local backup in Settings. Under “Account and synchronization”, sign in or create a Fridsee account, then select the destination household. Stay in Local Free mode for now.
- Activate Premium. In Settings, open “Premium in Google Play”, choose a subscription and confirm the store purchase. Wait until Premium is active for the selected household. If the household already has Premium, do not buy another subscription.
- Copy your data. In Settings, choose “Import Local Free to Premium”. Check the account and destination household, tap “Check Premium and preview”, select the items you need and confirm the copy. Copy up to 200 items at a time; split larger inventories into batches.
- Enable cloud mode. Only after a successful copy, return to Settings, tap the “Local Free” row and confirm switching to “Cloud household”. Neither purchasing nor importing changes the mode automatically.
Check the result. Wait for synchronization and check the household name, inventory and shopping list. Make further changes in cloud mode. If you have no local data to transfer, you may skip the import.
Invite household members. In “Households”, open member management and send an invitation to their email address. The recipient signs in using the invited address, opens “Households” → “Invitations” (envelope), accepts and selects that household.
Enable cloud mode on each member’s device too. Members use the household’s Premium without a separate subscription. They import their Local data only if they want to add it to the shared inventory — do not copy the same data again without checking the preview.
Import copies current products and unpurchased shopping items. History and old queues remain local. Similar names are unchecked by default; review them before confirming. Quantities are not merged automatically.
Local originals remain on your phone. After importing, Local and cloud data are independent. Returning to Local Free does not download cloud changes.
The screenshots below show version 0.2.44 screens rendered with demo data. Premium is shown after activation; Settings shows a signed-in account in local mode. Availability on Google Play depends on review completion; new link labels may differ in older versions.
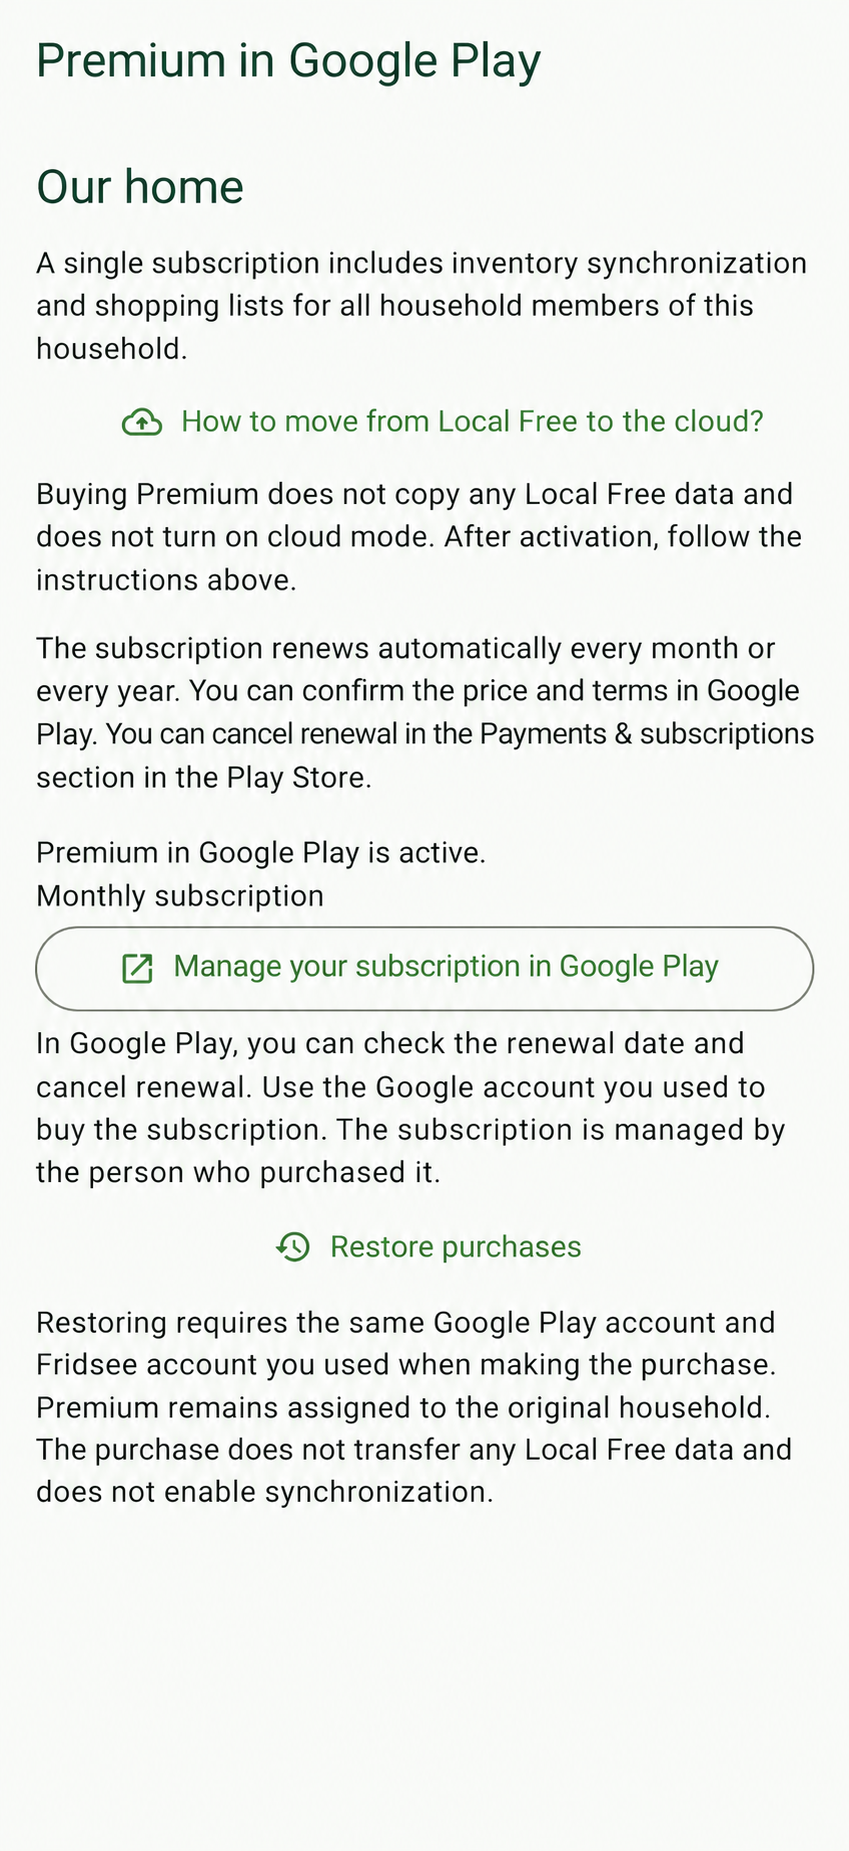
1. Premium active
After purchase, check activation for the correct household. Purchasing does not start import or synchronization.
English illustration · Sample dataEnlarge view ↗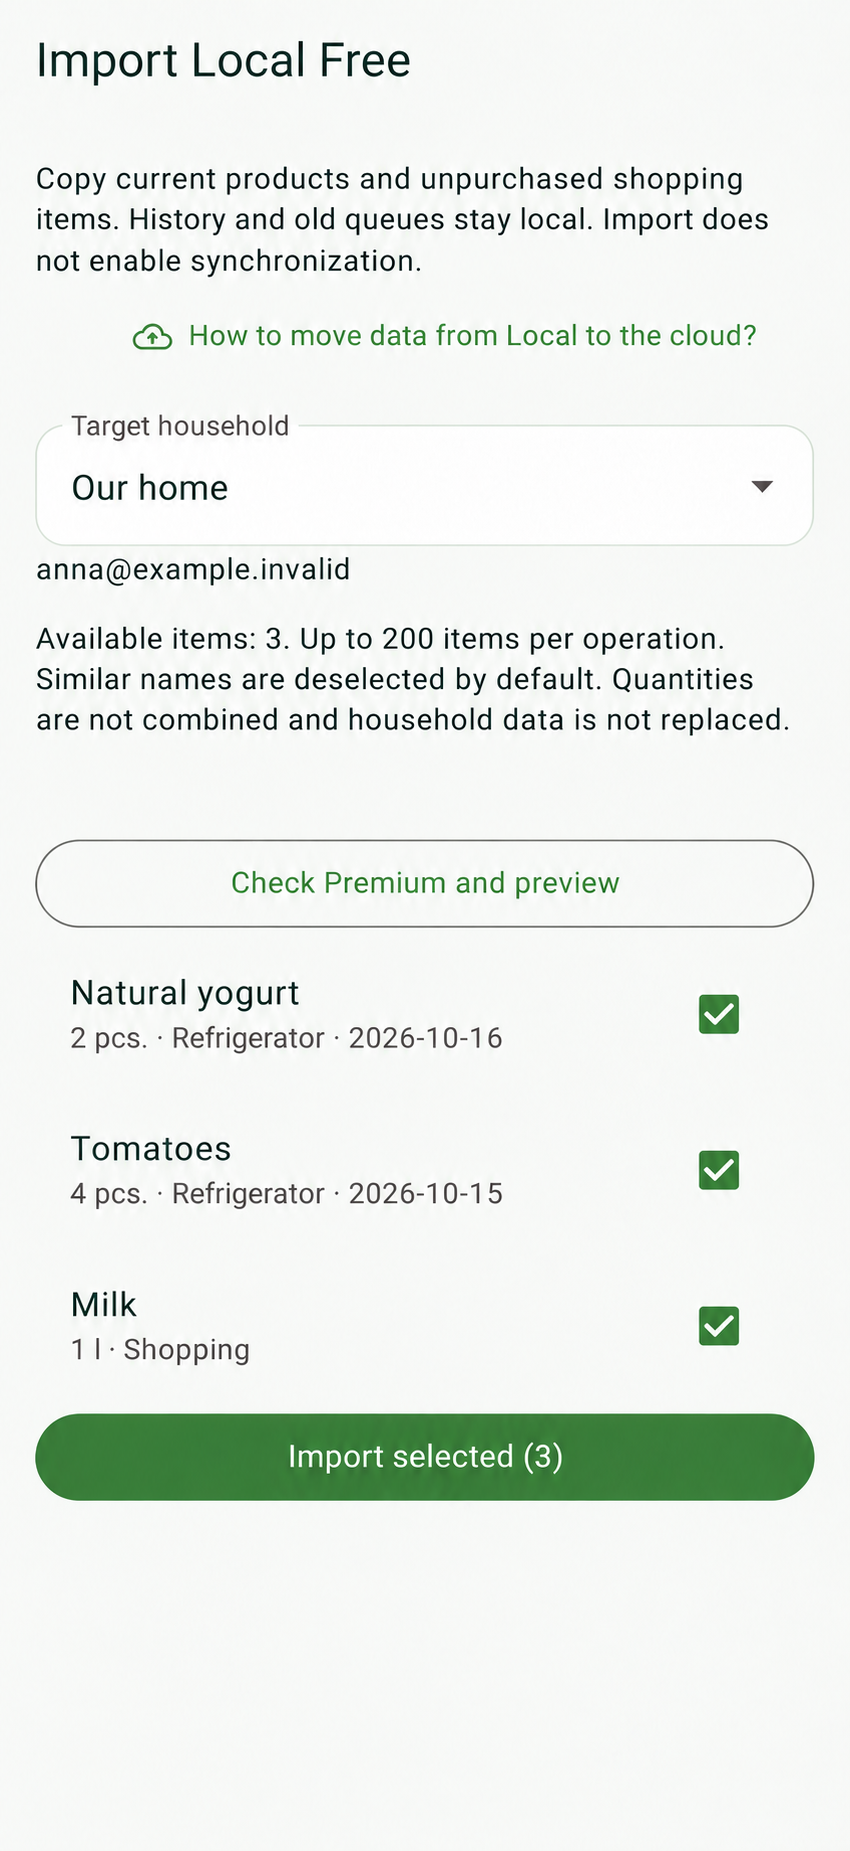
2. Data copy preview
Check the household and selected inventory and shopping items. Confirm the copy only after reviewing the preview.
English illustration · Sample dataEnlarge view ↗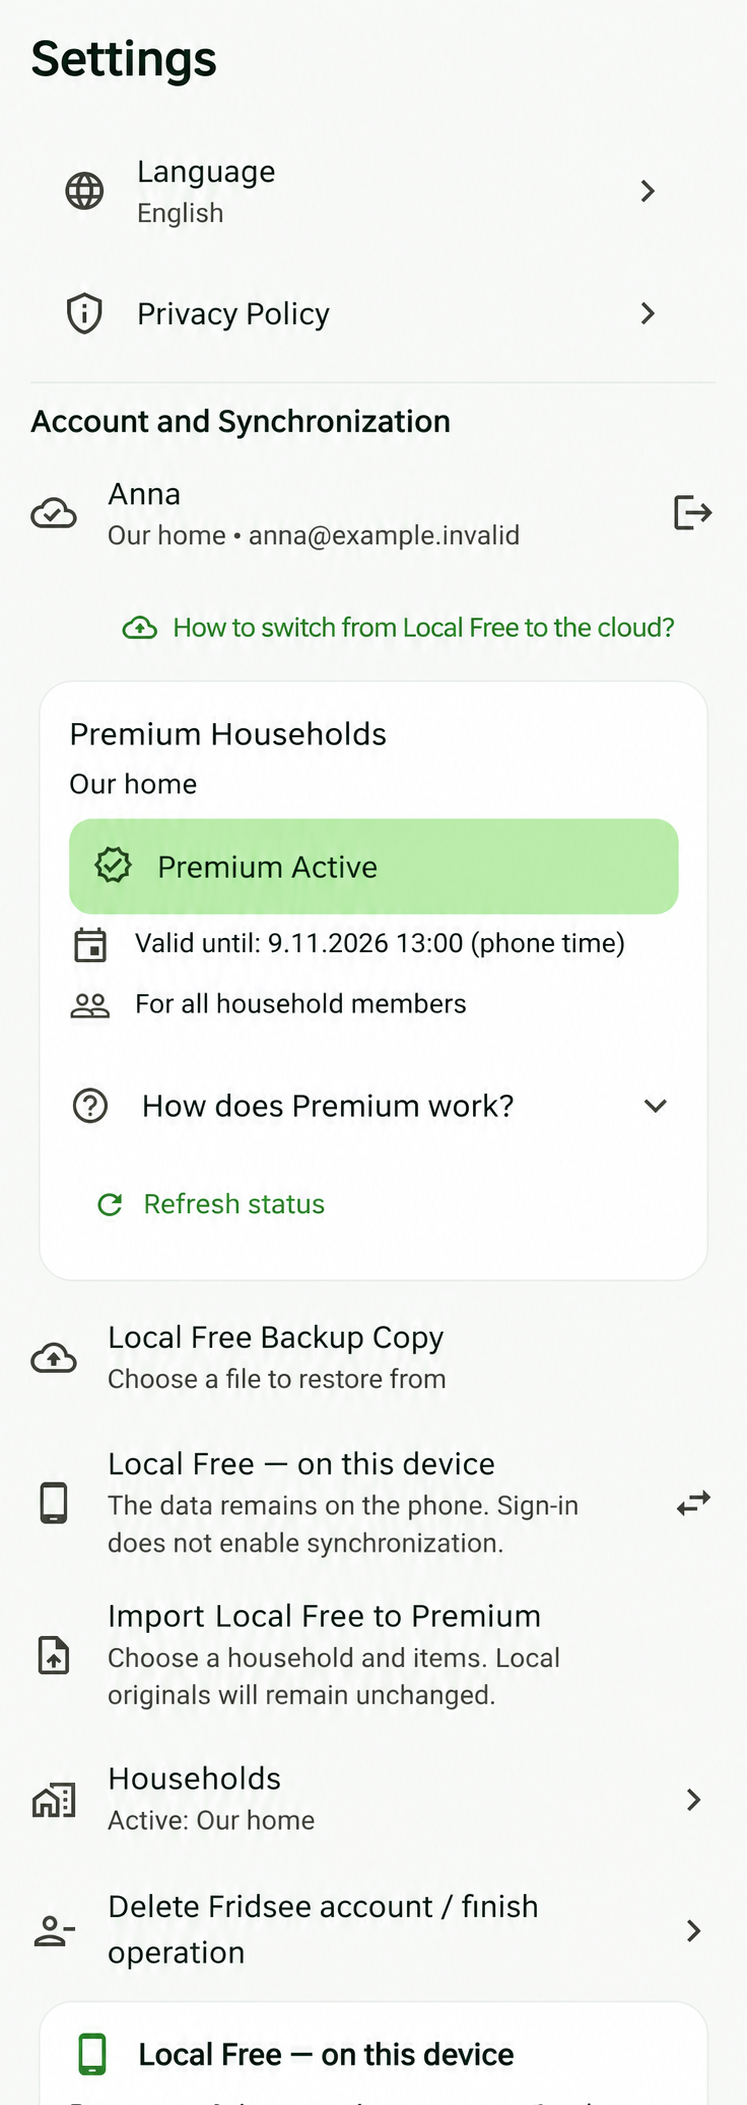
3. Switch mode in Settings
After signing in, activating Premium and successfully importing, tap “Local Free” and confirm switching to the cloud household.
English illustration · Sample dataEnlarge view ↗Adding and organising your inventory
- Under “Inventory”, choose “Add product”. Enter a code or scan it with the camera if your browser supports it.
- Enter the name, quantity, unit and storage location. Add packages with different dates as separate items.
- Enter the date or read it from a photo of the label. Always compare the recognised date with the packaging and confirm it before saving.
- Choose the date type: “Use by” or “Best before”. Do not interchange these labels.
- For each product, you can adjust the quantity, move it, or mark it as opened, frozen, consumed, discarded or donated.
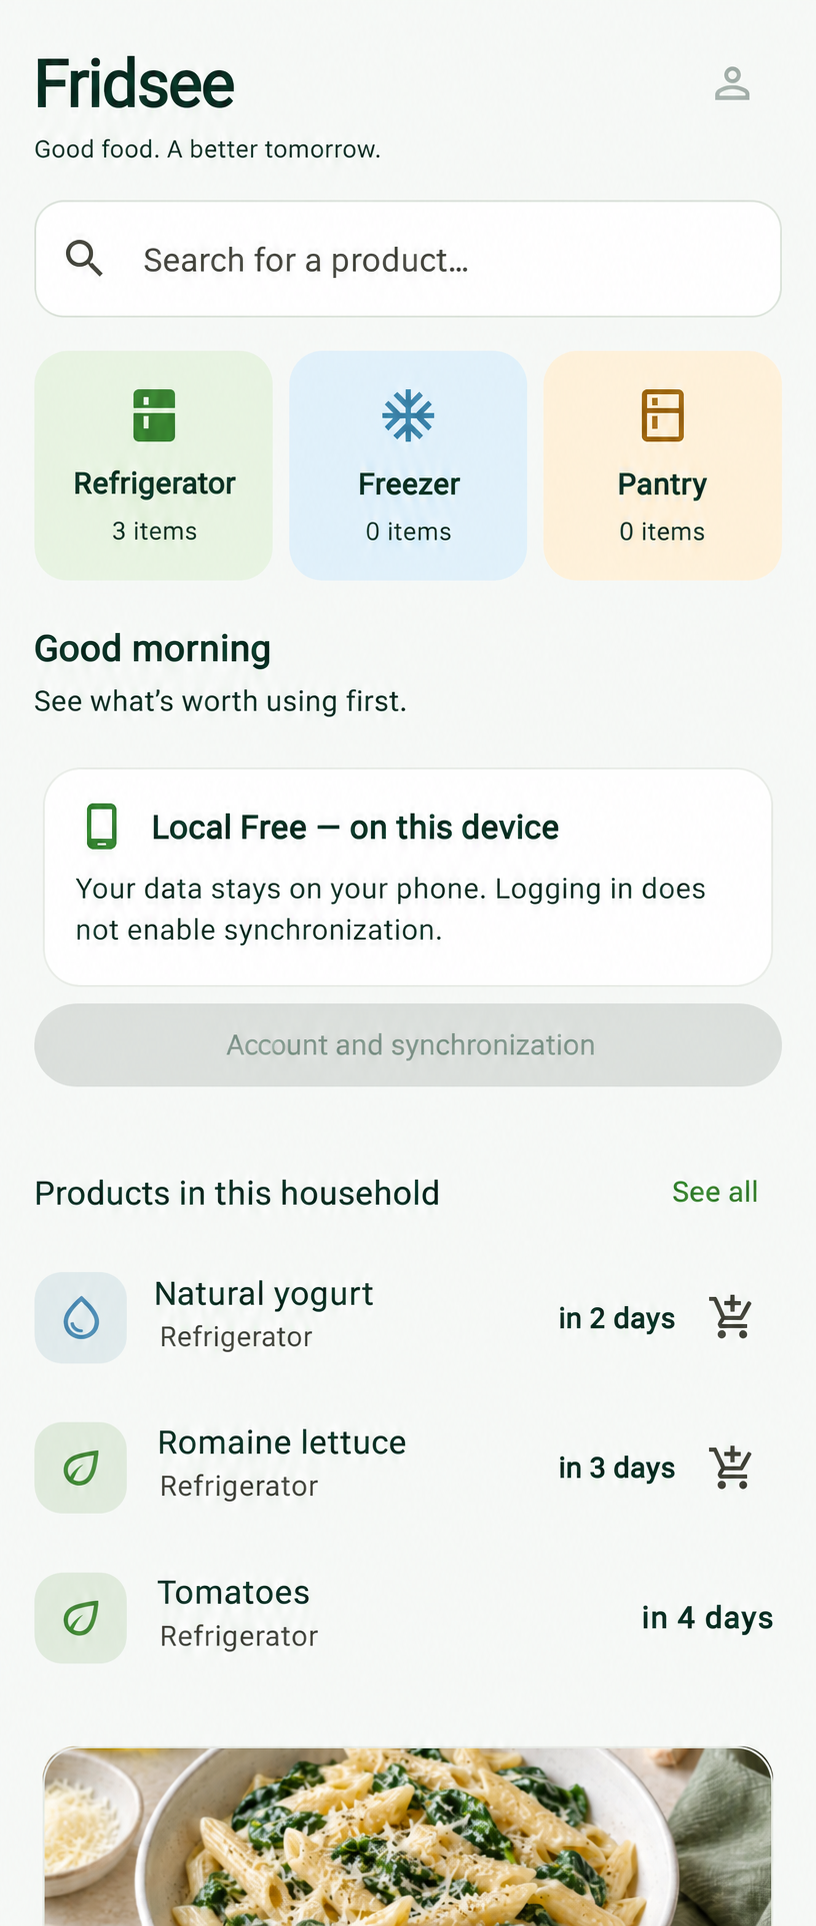
App home screen
Search for a product or tap a storage location to open its inventory. Each product shows its expiry and category symbol.
English illustration · Sample dataEnlarge view ↗Expiry dates and reminders
- The “Today” view shows your household overview and products that need attention.
- Under “Expiry dates”, you will find the effective date, including rules after opening. Messages come from the same engine as in the app.
- Under “Settings”, set the summary time, time zone and category rules. Push notifications are delivered by the configured mobile app; the website shows alerts and their history.
Recipes and cooking
- Under “Cook”, choose recipes with all ingredients available, only a few missing ingredients, or ingredients that need using soon.
- Set filters for diet, allergens, time and equipment. Check ingredients and packaging — filtering depends on how complete the recipe data is.
- Open a recipe. You can add any missing ingredients to the shopping list.
- Follow the cooking steps. Ingredients are deducted from inventory only after the final “Cooked” confirmation. Quantities refer to the number of servings specified in the recipe.
- After cooking, you can rate the recipe and check your history.
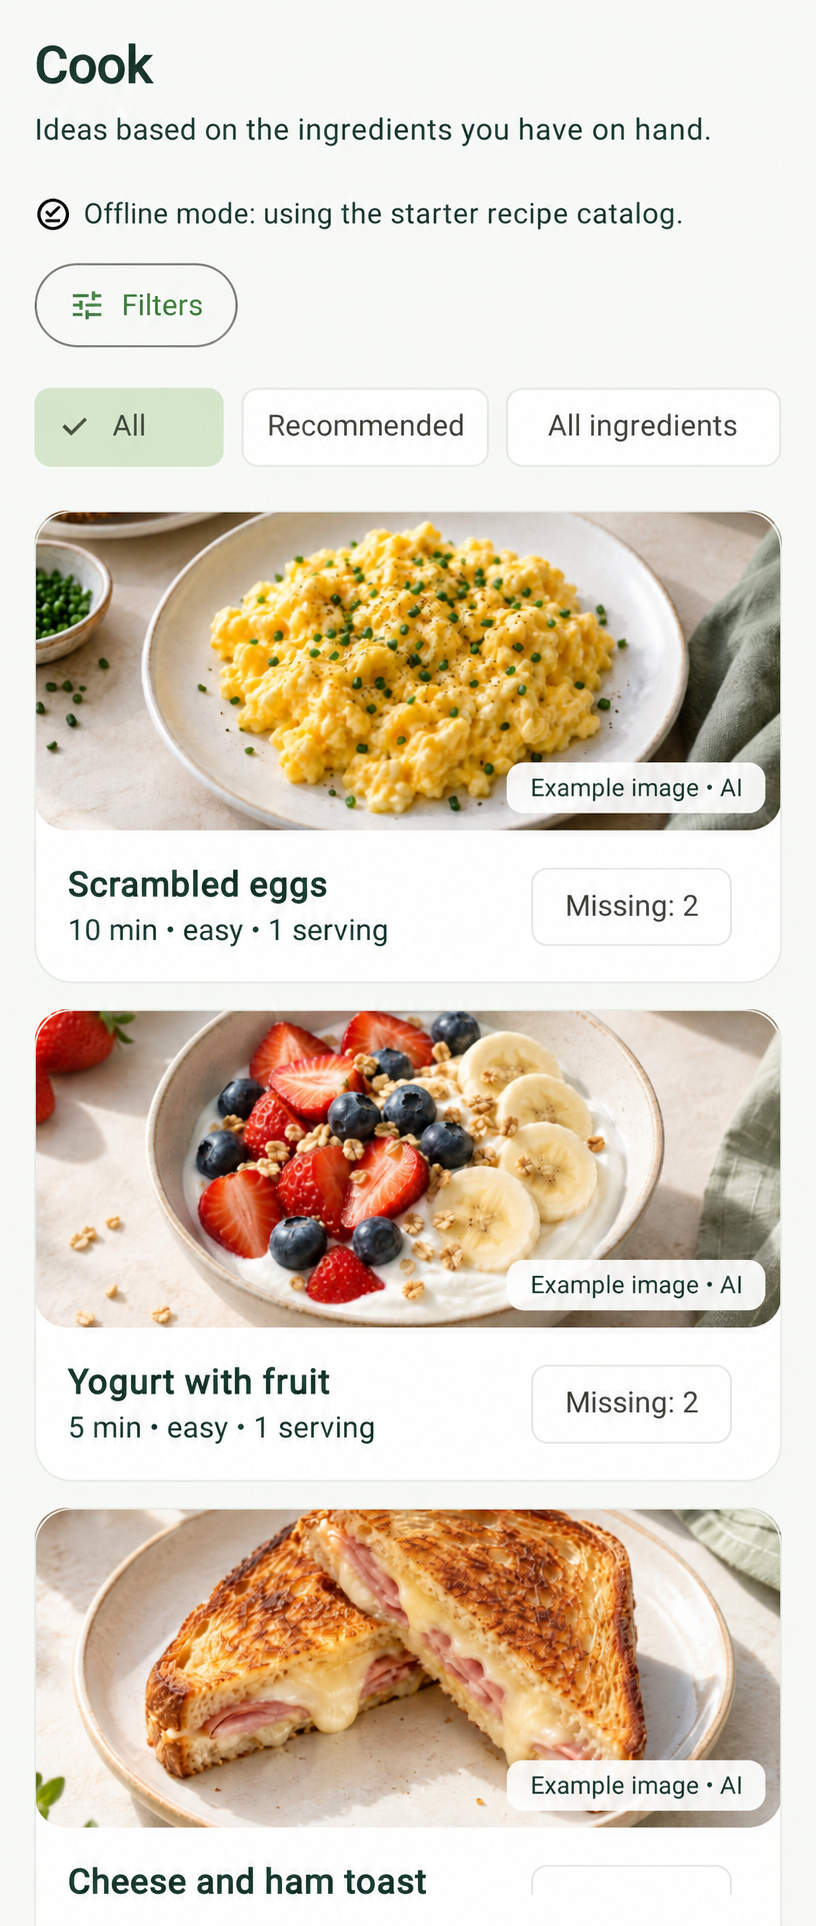
Choosing a recipe
Browse recipes with illustrative photos. Filters and missing-ingredient information help you choose a meal.
English illustration · Sample dataEnlarge view ↗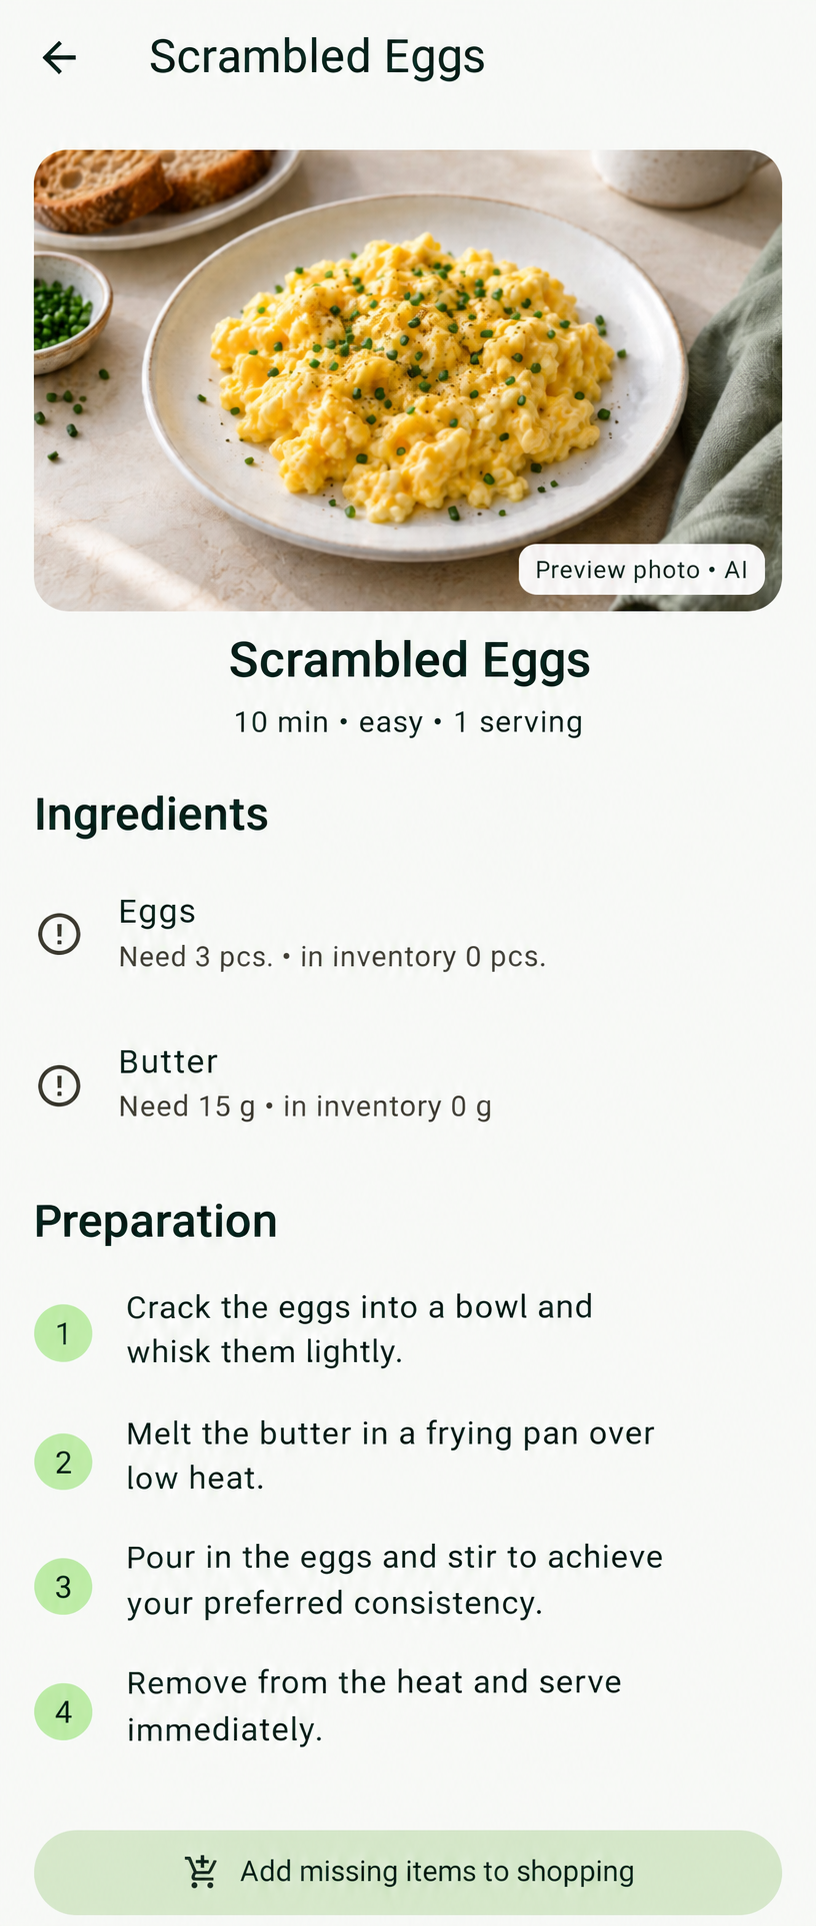
Ingredients and preparation
Open a recipe to check its ingredients and steps. You can add missing products to your shopping list.
English illustration · Sample dataEnlarge view ↗Shared shopping list
- Add a product manually or add missing ingredients from a recipe.
- Household members see the same list after refreshing. Mark the items you have bought.
- Choose “Add to inventory” and enter the location and expiry date. The product will be added to your household without retyping its name.
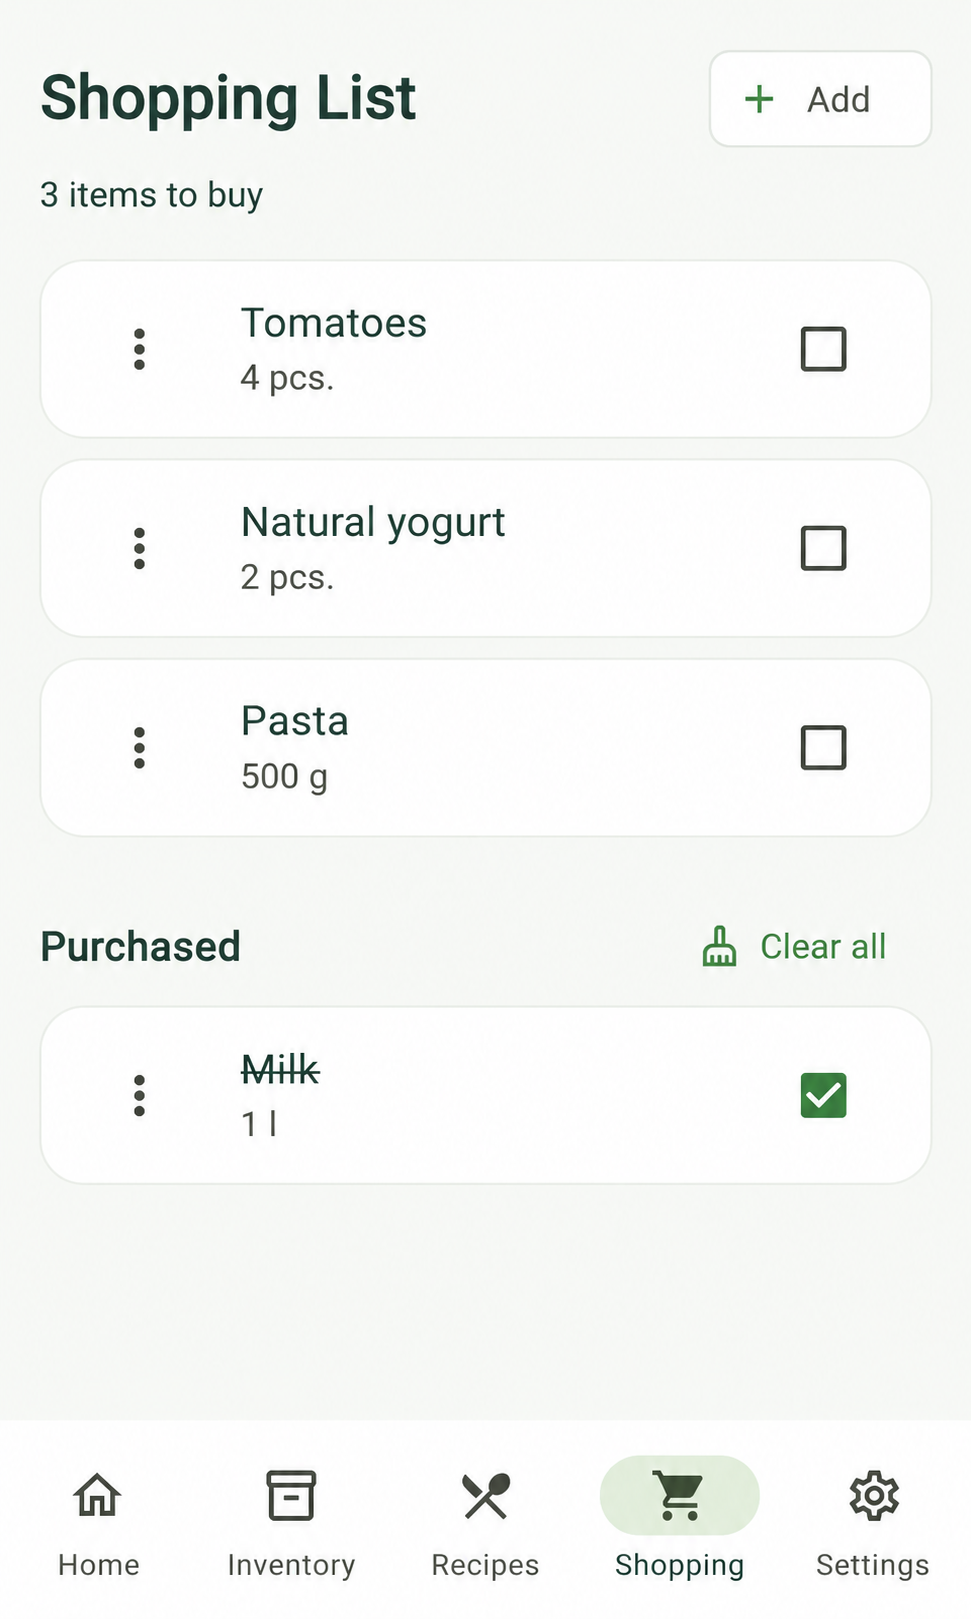
Shopping list in the app
Add products, mark purchased items and move them to your inventory. This example shows a list in local mode.
English illustration · Sample dataEnlarge view ↗Households and members
- Under “Household”, create a new household or switch to another one.
- The owner can invite someone by email. The invitation appears in their account; if the system returns a code, you can share it yourself.
- The recipient accepts a pending invitation or enters the code they received.
- Actions such as removing a member, leaving a household or transferring ownership require confirmation.
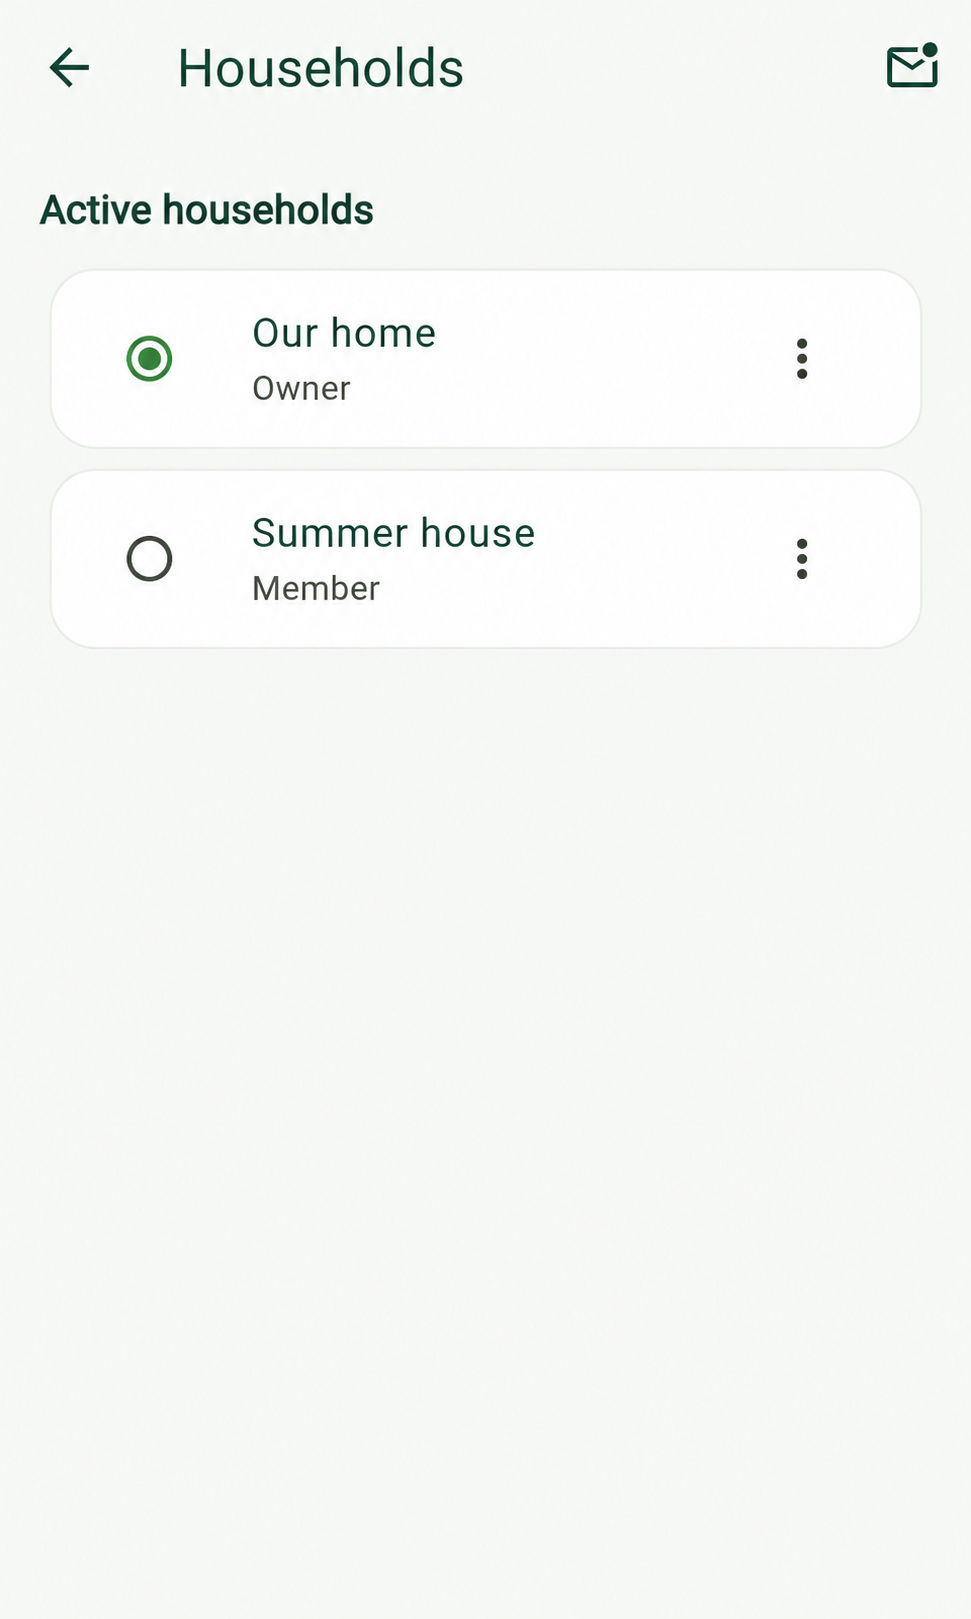
Choosing and managing a household
Select an active household. Its menu lets the owner manage members, rename or archive the household.
English illustration · Sample dataEnlarge view ↗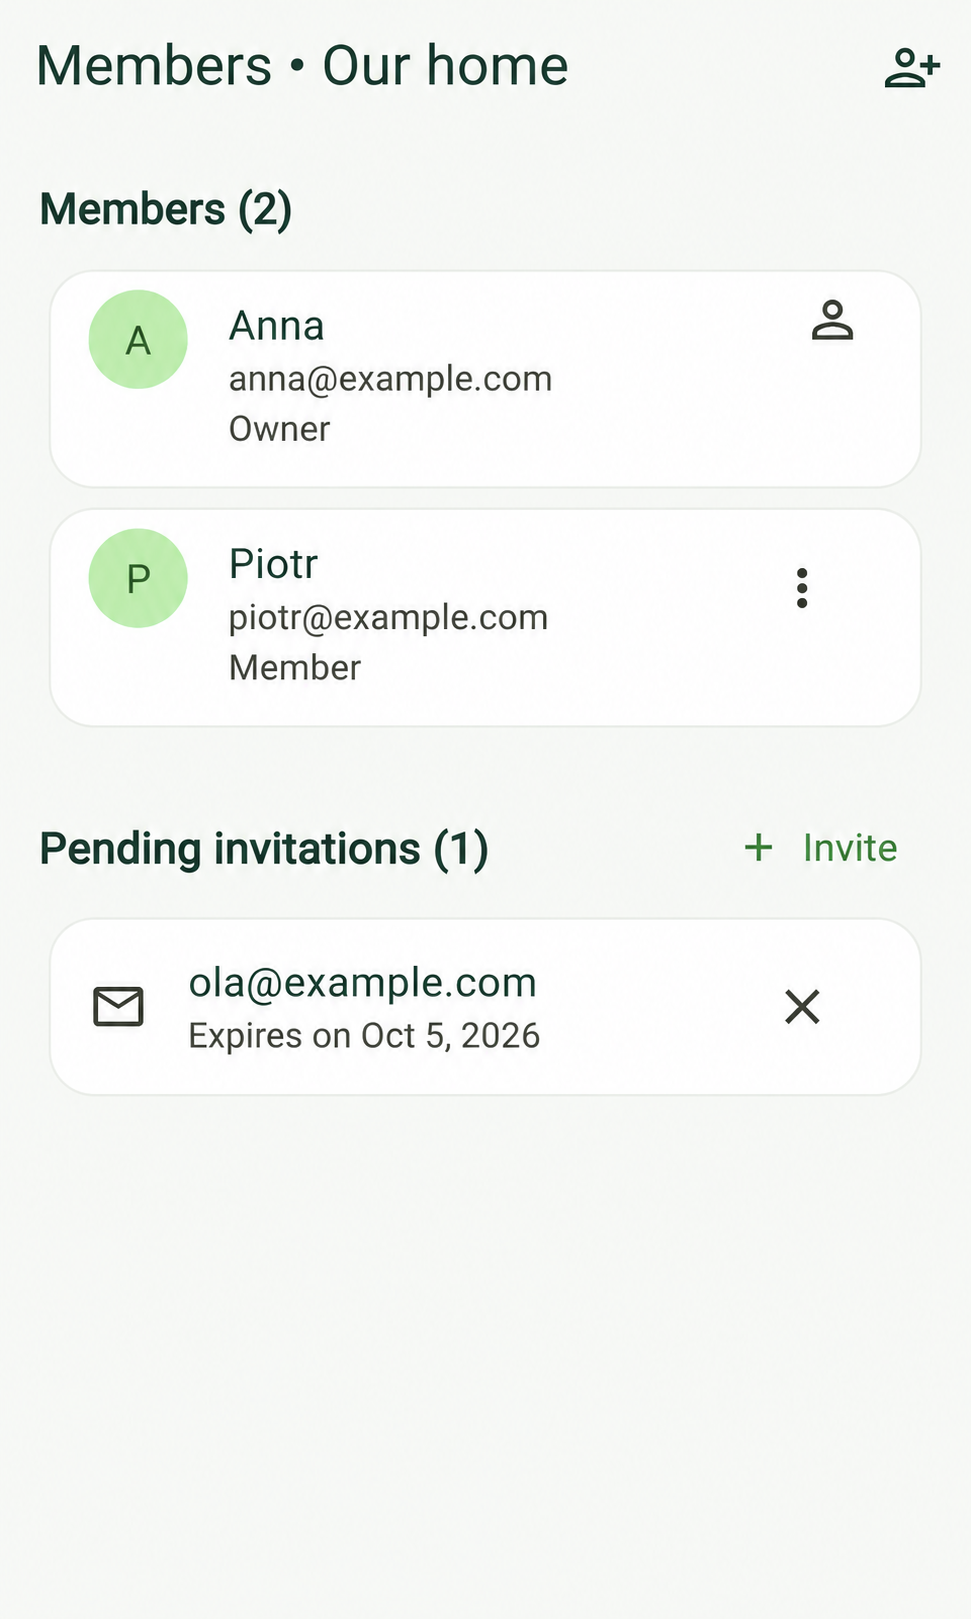
Household members and invitations
Review member roles and pending invitations. The owner can invite more people and manage access to the household.
English illustration · Sample dataEnlarge view ↗Connection and resolving conflicts
- The panel needs a connection to sign in and load data. If you go offline during an open session, the last loaded data remains on screen.
- Selected inventory changes with version checks can be queued on this device. They are not applied on the server until you send them after reconnecting.
- If another household member changes the same item, you will see a conflict. Refresh the data and review your change instead of overwriting theirs.
- Do not immediately repeat an action if the connection result is uncertain. Check the current state first.
Camera, OCR and reporting errors
- Allow camera access only when you want to scan. You can also choose a label photo from your device.
- Text recognition runs in your browser after downloading the OCR module. The image is not sent to the Fridsee API.
- If the camera or recognition is unavailable, enter the code and date manually.
- Report recognition errors under “Scan”, including the expected value. Reports do not automatically change the product catalogue.